
As an Amazon Associate we earn from qualifying purchases. This article contains affiliate links; we may earn a small commission at no extra cost to you.
Chicken coop ventilation is the single most important, yet often misunderstood, factor in keeping backyard chickens healthy and comfortable year-round. If your coop ever smells sharp, feels damp in the mornings, or your birds have pasty combs in winter, your airflow strategy needs a serious checkup.
Key Takeaways
- Proper chicken coop ventilation removes moisture and ammonia, protecting your flock from frostbite and respiratory issues all year.
- Always size your coop vents based on both air changes per hour (ACH) and cubic feet per minute (CFM) per bird—especially in winter.
- Small DIY tweaks—like adding permanent, high vents and splitting inlets/outlets—can solve most airflow mistakes affordably.
- Why Proper Chicken Coop Ventilation is Critical
- How Much Ventilation Does Your Coop Really Need?
- Understanding Types of Coop Vents & Airflow Features
- What Can Go Wrong? Common Owner Mistakes & Problems
- Solutions: Practical Fixes & Upgrades That Work
- Costs: Price Ranges for Coop Vents & Installation
- Top 3 Gaps Left by Competitor Guides (And How to Avoid Them)
- Step-by-Step Checklist: Setting Up Healthy Coop Ventilation
- Frequently Asked Questions
Why Proper Chicken Coop Ventilation is Critical
Chicken coop ventilation isn’t about “fresh air” just for comfort—your birds’ health depends on moving out moisture and gases every single night. Hens exhale warm, damp air and their droppings constantly release ammonia. In a sealed or under-ventilated coop, humidity soars and ammonia rapidly builds up at roost height where chickens are breathing all night long.

Here’s what happens if chicken coop ventilation falls short:
- Ammonia buildup damages respiratory systems and causes permanent eye and lung damage.
- High humidity (not low temperatures) is the real cause of frostbite on combs and wattles in cold weather.
- Damp coops promote the spread of mold, bacteria, and parasites, making bedding smellier and cleaning tougher.
As highlighted by ventilation experts: “Most failing winter coops are not too cold—they are too humid. Frostbite, pasty combs, and respiratory illness almost always trace back to undersized vent area, not insulation.”
If you’ve ever noticed persistent odor, damp bedding, or sluggish chickens, airflow—not more bedding or insulation—is nearly always the real fix.
If you’re concerned about keeping chickens warm, see our guide to keep chickens warm in winter—but remember: dry air beats drafts every time when it comes to flock health.
How Much Ventilation Does Your Coop Really Need?
Sizing chicken coop ventilation isn’t as easy as poking in a vent or two above the roost. The latest research and experienced keepers agree: good airflow means consistent air exchange rates, both for summer and winter.
- Summer Standard: About 5 CFM (cubic feet per minute) of airflow per adult standard hen is needed in hot weather. This is roughly the airflow provided in commercial buildings designed for healthy air quality.
- Winter Standard: At least 1 CFM per bird even on the coldest nights—yes, year-round. This minimum keeps humidity and ammonia at safe levels.
To translate this into simple vent sizing: a backyard chicken coop needs roughly 144 square inches of vent per 10 square feet of floor area, split evenly between low inlets and high outlets (source). This vent area allows around 11–12 full air changes per hour (ACH), enough to remove moisture and ammonia before they become a threat.
- Calculate your coop’s square footage (length x width inside the walls).
- Multiply by 14.4 to get your total minimum venting in square inches (10 sq ft = 144 sq in).
- Divide this total in half: half are low wall inlets, half are high wall or roof outlets.
If in doubt, it’s safer to go on the higher side—especially for flocks larger than five or in humid climates. Too little ventilation is far more dangerous and costly to chicken health than slightly too much, provided drafts at roost height are avoided.
Looking for help selecting a coop that meets winter standards? See our roundup of the best chicken coop for cold weather.
Understanding Types of Coop Vents & Airflow Features
Coop vents come in several forms, each playing a vital role in controlled airflow. Here’s what matters:
- Low inlets: Vents near the floor let in cooler, fresh air—but should be placed away from direct roost drafts.
- High outlets: Vents high on the walls or ridge (gable, soffit, or roofline or gable vents) are crucial for letting humid, ammonia-laden air escape.
- Windows: Provide both light and airflow in warm months; best fitted with screens and positioned to avoid rain entry.
- Adjustable covers: Essential for managing airflow as seasons change, but never fully close vents in winter. Permanent, upper vents must always stay open.
In a typical setup, you’ll get best results dividing your total vent area between low inlets and high outlets. Ridge vents can be extremely effective, especially in damp climates, while soffit vents are easily added even to unfinished coops.
For real-world consistency, install large hardware cloth-covered vents high up that can’t be shut. Adjustable covers can be used for lower vents to control drafts. Remember, dampness—not cold—is what brings problems.
For more on essential coop add-ons, check out chicken coop accessories—you’ll find more venting tips plus predator-proof ideas.
What Can Go Wrong? Common Owner Mistakes & Problems
Despite good intentions, backyard keepers often run into repeating problems with chicken coop ventilation—especially when they build or buy prebuilt coops that simply don’t provide enough airflow. Here are the most common pitfalls:
| Mistake / Problem | Why It Happens | Solution |
|---|---|---|
| Undersized or blocked vents | Vents get covered for “warmth” or never properly installed; dust and feathers also clog vents if not cleaned seasonally. | Calculate proper vent area, split between high/low. Check and clean vents often. |
| Uncomfortable drafts | Inlets positioned directly in line with roosts or nestboxes; large open windows left unmuffled in winter. | Reposition or baffle inlets. Use covers on low inlets only. |
| Persistent odor/ammonia buildup | Air doesn’t exchange fast enough to remove ammonia daily, especially in wet/cold weather. | Increase vent size, add a small fan, or use absorbent bedding. See coop deodorizer ideas. |
| Frostbite/combs & wattles | High humidity, not temperature—moisture condenses on birds overnight. | Keep upper vents always open. Monitor for sweating walls or window condensation. |
As The Poultry Site notes, commercial poultry houses are engineered specifically to prevent ammonia buildup—but backyard owners are left to DIY and trial and error.
Don’t want to go it alone? Our coop space requirements guide explains sizing and airflow together for flock health.
Solutions: Practical Fixes & Upgrades That Work
Fixing chicken coop ventilation doesn’t have to break the bank or require major remodeling. Here’s how real owners—and poultry science—suggest tweaking your setup for the healthiest year-round air.
What actually works, according to experienced keepers and scientists (source):
- Increase permanent vent area: Start with extra roofline or gable vents. Use hardware cloth to keep predators out.
- Add small, quiet fans (in summer)—clip-on or solar models help move stale air out, especially in muggy climates. See our summer cooling tips for more ideas.
- Reposition vents: Move existing wall vents higher, away from direct roost line. Split total area half low, half high for better circulation.
- Install adjustable vent covers: In moderate climates, baffles or exterior shutters let you fine-tune airflow without completely blocking it.
- Use absorbent bedding: Materials like wood shavings or chopped straw slow ammonia release and supplement airflow. Learn more about this at best chicken coop bedding.
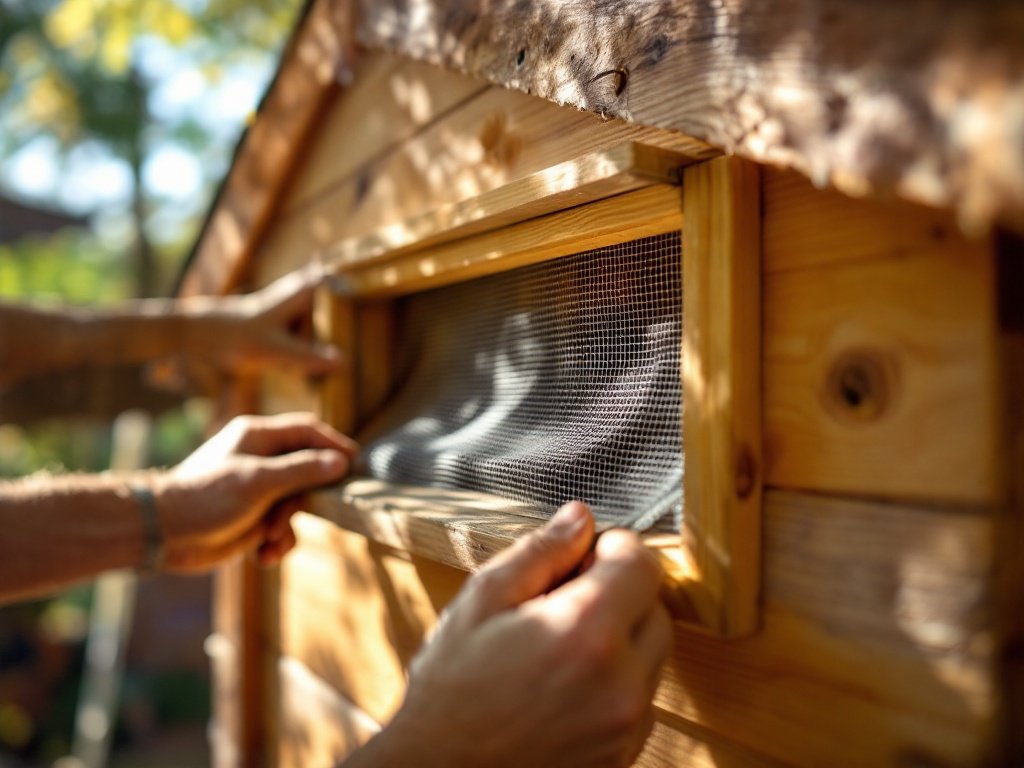
Permanent, year-round vents placed high up are a must—these cannot be fully closed, even in the depths of winter. According to Gypsy Shoals Farm, well-ventilated coops circulate air without chilling birds.
Still troubleshooting? Adding a low-wattage fan or improving pop door access can help, but overspending rarely solves what $20 in extra vents fixes.
Costs: Price Ranges for Coop Vents & Installation
Chicken coop ventilation can be affordable and DIY-friendly, or upgraded with commercial hardware if you want a pro finish. Here’s what to expect:
- DIY simple vents: Using plywood, hardware cloth, and hinges, you can add adjustable vents to most coops for the cost of basic materials.
- Store-bought intake/exhaust vents: Many chicken supply stores and home improvement retailers sell gable vents, soffit vents, and adjustable louvers in a wide price range—from simple plastic ($10–$30 each, depending on size) to heavy-gauge aluminum or combination window-vents ($30 and up per vent).
- Fans (optional for summer): Small indoor-rated fans or solar ventilators range in price, check poultry supply or online marketplaces for current deals.
- Professional installation: Hiring a handyman or carpenter brings labor costs, which can be significant—most owners opt for DIY to keep costs reasonable.
Bottom line: Most backyard keepers add or expand vents for the cost of a few hardware store parts and an afternoon’s labor. Always factor in predator-proofing when planning your airflow changes.
Top 3 Gaps Left by Competitor Guides (And How to Avoid Them)
Most popular chicken coop ventilation advice online falls short in three key areas:
- No specific CFM/ACH numbers: Many guides use only vague formulas like “1 square foot of vent per 10 sq ft of coop” and skip detailed per-bird airflow targets, leaving new owners guessing. (source)
- Ignores real cost and DIY alternatives: Few tell you that most ventilation upgrades can be done with simple hardware, or what to budget if you want ready-made vents or fans.
- Fails to address year-round demands: Top guides rarely warn you that winter ventilation is non-negotiable and only permanent, high vents work in freezing weather.
This guide covers exact vent sizing by bird, tested fixes for real-world airflow issues, and realistic costs—plus maintenance and troubleshooting advice. For more complete flock care info, explore our guides to egg incubators and the best nesting boxes.
Step-by-Step Checklist: Setting Up Healthy Coop Ventilation
- Calculate your vent needs: For each 10 square feet of coop floor, install at least 144 square inches of vent area.
- Split vent area evenly: Half should be low (inlets), half high (outlets), above roost height.
- Never close high vents in winter: Baffle or partially close only lower inlets to manage drafts.
- Check airflow: Hold a ribbon or candle near vents on windy days to ensure air is moving in and out. If not, increase vent area or re-position.
- Monitor coop health signs: Watch for wall condensation, ammonia odor, or frost on combs—these mean you need more airflow.
- Clean out and inspect vents seasonally: Remove dust and cobwebs; check screens/hardware cloth for damage.
- Stay proactive each season: Remember that “undersized vent area” is the main cause of health issues—vent numbers above are the safest minimum every backyard coop should clear.

Every upgrade helps your chickens breathe easier. Combine smart airflow with sturdy construction—if you need tips, check our guide to predator-proofing.
Frequently Asked Questions
How do I know if my chicken coop ventilation is enough?
If your coop has no persistent ammonia odor, bedding stays dry, and you never see condensation on walls or window condensation—even during winter—your airflow is likely sufficient. If birds show frostbite or you smell strong ammonia, upgrade your venting.
Should I close coop vents in winter?
No. Never fully close high or roofline vents in winter. Only adjust low inlets if drafts bother birds, but always keep some air flowing out to remove moisture/humidity that causes frostbite.
What are signs my birds are suffering from ammonia buildup?
Look for watery or inflamed eyes, coughing, or reduced activity, especially if the coop smells sharp or acrid. Persistent odors also signal airflow issues and require immediate attention.
Can I use a fan inside my chicken coop?
Yes, especially in summer. Small fans can help move air and lower temperatures. Always shield cords, prevent bird access, and use only weather-appropriate (or solar) models.
Is more insulation better than more ventilation in winter?
No. Over-insulation traps moisture. Keeping dry air moving is far more important for chicken health than keeping heat in. Insulate walls only if you can guarantee upper vents always remain open.
Sources
- BackYardChickens — Chicken Coop Ventilation
- BackYardChickens — Repecka Illustrates Coop Ventilation
- Meyer Hatchery — Coop Ventilation and Why it is Important
- Permies — Ventilation Essentials: How Much Airflow Does Your Coop Really Need?
- Hobby Farms — Coop Builder: Ensure Proper Ventilation Without Drafts